What Is The Difference Between A Claw Hammer And A Split Hammer?
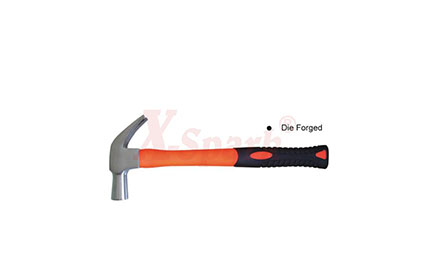
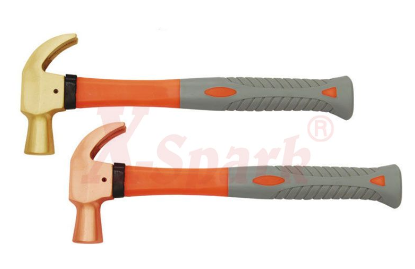
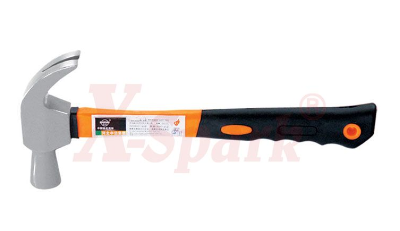
A claw hammer is what most people imagine when they think of hammers. It features a rounded, flat head on one side, which is designed for driving nails. The other side has a curved, claw-like end that can be used for a variety of purposes. Framing hammers and rip hammers are similar, but they have a straight claw instead of a curved one like the claw hammer has.

Split Hammer
What is a split hammer? Split hammers are commonly used for the frame and tear construction tasks. It is flatter than a claw hammer and is used to tear wood nailed together.A framing hammer is essentially the same as a regular claw hammer except:
Length: It will be a few inches longer than a normal hammer, providing you with more leverage.
Weight: Extra ounces in the framing hammer's head give more inertia for driving nails.
Milled Face: It may have a ridged, milled hammer face to prevent slipping when the head strikes the nail.
Claw: It may have a flatter claw.
Compare a typical claw hammer's 16 oz. weight to this monster called the Pull'R Holdings D024C Deadon, which is 24 oz.
Eight ounces difference may not seem like much, but consider that this is a half-pound and it is being held by one hand.
Length of the framing hammer also may cause wrist strain. Inexpensive claw hammers run about 10 inches. Framing hammers add another half-foot to this to do the job effectively.
Milled Face Prevents Slipping
Finally, some framing hammers may have a ridged or milled hammer face. While regular claw hammers may have milled faces, and vice versa, there are framing hammers that may not have this.
If you are pounding nails into noncompliant lumber, you need all the help you can get. The ridging sure helps you pound harder without fear of the hammer slipping from the nail head. The ridging is not appropriate for most renovation projects where appearance matters. Hammer face ridging only works where you can pound away and not care that your building material surface is steadily getting pockmarked.
NOTE:
A framing hammer is not for everyone and not for every home renovation project. If you shell out for a framing hammer, don't be surprised if it sits on your tool bench for months before you find occasion to use it. Plus, if you don't have the hand and wrist strength to swing 28 ounces, you may find that it sits in your workbench forever.
Claw Hammer
The curved claw hammer is a double-headed hammer used to hammer and pull out nails. One end of a curved claw hammer is deeper and the other side is flatter. This is usually used to pull out nails.
A split hammer is a heavy-duty tool, mainly used by professionals, while the angled claw hammer is a light-weight tool that ordinary users can use at home. Therefore, you will most likely use a claw hammer!
What does a claw hammer do?
ㆍHammering and Removing Nails
The most basic use for a claw hammer is driving nails into materials. This could include something as simple as pounding in a nail to hang a picture or as involved as installing studs to frame out a room. The flat, rounded side enables you to drive nails perfectly.
If you need to remove nails, the claw side provides the leverage to pull them out of a board, wall, or other materials. This part comes in handy if you drive the nail in the incorrect spot or you're taking something off the wall that you no longer want to display.
ㆍMinor Demolition for Projects
If you're completely gutting and remodeling your bathroom, you'll likely need a wide range of tools for the demolition. However, a hammer can help you with some parts of a small demolition project. It works well to pry off trim or pry apart other materials. You can also use the flat, rounded part to smash through materials, although a sledgehammer will be much more efficient for larger jobs.
ㆍSplitting Small Pieces of Wood
The sturdy, metal claw portion of the hammer is strong enough to chop through small pieces of wood. Think of it as a tiny version of an axe. If you don't have an appropriate cutting tool available, use the claw to split a block of wood for a project. It's not efficient for large-scale wood-splitting projects, but it can come in handy for a quick job.
ㆍDigging Small Holes
In a pinch, you can use the claw end of the hammer to dig a small hole. The claw end is very strong, so it can dig down into dirt, even if it's very hard or frozen. Use it to dig little divots in the ground for the legs of your extension ladder, or use the claw end to pry a stubborn rock out of the ground when you're working on a landscaping project. If you need to break up a larger stone, pair your hammer with a chisel to tackle the job.
If a smaller blow is required when forming things such as metal plates, a rubber hammer is the most effective tool. In fact, it looks like a typical wooden or metal hammer, except that the head is equipped with a rubber coating. Therefore, any impact on the metal will not leave any marks on the material to be formed under a soft blow.
The typical design has a wooden handle and weighs 12 to 28 ounces. Rubber hammers are usually used to press tightly assembled wooden parts together, to change the position of gypsum board or for interior decoration. But in addition to this, a rubber hammer can also be used to form the metal plate, or the same tool can be used to remove or flatten the dent or metal sheet again. A perfect example of a rubber mallet being very suitable for use is to smooth out metal dents in a car. The following are the relevant steps.
Step 1-First assess the damage of the metal
Before starting to repair the metal or start a heavy blow, please evaluate the extent of the damage. Check for ripples, bumps, or creases. This is important because it will help you determine the level of effort required to level the metal and how long it will take.
Step 2-clean the area to be flattened
After assessing and determining the area to be flattened, remove all the dirt on the top of the metal so as not to merge the dirt with each stroke during the beating process. In most cases, it is recommended that you clean the area to be flattened. After washing, the area should be dried before starting to beat it. Except for dirt or grease, remove all items that may interfere with the entire ramming process. Do not use nails or other metal plates should be kept away from the work area.
Step 3-Put a suitable piece of wood on the metal
The block rests on the metal to help spread and evenly apply force each time the rubber mallet hits the metal. It should also be ensured that no traces are left on the metal during each blow. It is also important to wrap a piece of wood with a carpet so that the mallet will not leave any marks on the metal and will not damage the existing paint.
Step 4-start flattening the metal
When the block is in place, you can now start to flatten the metal. Before the first impact, it is usually recommended to cover the head or rubber part of the rubber mallet with a rubber blanket. This is also done to eliminate traces on the metal. It is important to always remember that taking some time will help achieve the best results.
Since a rubber hammer is often used because its impact on metal is relatively soft, it should be noted that the strike should be gentle, but with sufficient force. Hold the handle of the mallet firmly and hit the part that needs to be leveled. Before proceeding to the next stroke, make sure to observe the appropriate interval.
We are an adjustable stainless steel wrench supplier. If you are interested in our products, please feel free to contact us.
https://www.safetytools.com.cn/news1/difference-between-claw-hammer-split-hammer.html
175
0
0


Comments
All Comments (0)